Thursday, October 28, 2010

Kickin' Alfredo


Hey Kidz!  Been busy lately, so here's one that's quick and easy.  Chicken Alfredo!

This could be as simple as tossing a chicken breast onto the foreman grill, then onto a bowl of pasta with alfredo sauce.  But for the amateur gourmand, you gotta do something extravagant.  Still, this is an easy recipe.

Prepare a bowl with around 2 cups flour and spices - for your breading.  I added basil, oregano, and pepper. It will be easiest to put this in a tupperware-type container... a lid will help!

Put a pot of water on the stove and leave to boil...

Flatten and dice up a chicken breast (about 1/2 - 1 lb) into 1-inch chunks.  I also sprinkled some cayenne powder directly onto the chicken.  Now put the chunks into the bowl and shake vigorously.  After a minute, open the container and make sure all the chunks are nicely covered in the flour mix.

Ghost Chicken?
If the water is boiling, add half a box of pasta.  I used penne.  Fettuccine is the more traditional noodle.  But any will work. 
A cauldron of awesome...
Put some oil in a pan on half heat and carefully toss on the chicken pieces.  Every few minutes, turn the pieces (avoid splatter!) until each side looks crispy.


While doing this, keep an eye on the pasta.  A few minutes after you begin boiling, add some vegetables.  I used about a handful each of spinach and broccoli.  Gotta get the vitamins in somewhere!

Mmm... empty vitamins...
Wait until the chicken is fully cooked and the pasta is tender, then drain the pasta.  Add the chicken to the pasta, and top off with a cup of Alfredo Sauce.


I was in a hurry, so I used a store brand sauce.  If you want to make your own, its a mix of milk, flour, butter, and garlic.  I'll work on a recipe and let you know!

Mix everything together until all the chicken and pasta is covered in sauce.  And voila, you're done!  Start to finish this shouldn't even take 20 minutes...  The chicken breading and cooking took only a minute or two longer than the pasta to cook.


Please click on my sponsors so I can get a better camera!!!

Let me know if you want more quickie recipes, or more extravagant cuisine.  I'll continue with a mix of the two in the meantime!


-Josh

Saturday, October 23, 2010

Reuben Omelet

Ok, you talked me in to it!  The Reuben Omelet Blog:

Wanted to use up some corned beef that was heading towards the big meat locker in the sky, so I came up with this quickie:

Start out an omelet like normal.  Dice up some corned beef and toss it in.  Add sauerkraut, swiss, and thousand island dressing to the middle.  Fold, serve, eat, enjoy!

Ok, I cheated a bit and used american cheese and italian dressing, but good enough!  I also did it more as a scramble since the omelet fell apart on me  :S.  But this perhaps came out better...  the ingredients were more 'cooked' and mixed together...  Also, I used corned beef cold cut slices, which rocked, but if you have some pot-roasted corned beef chunks... well lets just say i'm drooling already...


Know how to make a cool, original omelet?  Tell us!!!  We'll put the best ones in a future post!

-J

Wednesday, October 20, 2010

Awesomeloaf!

Gather ‘round foodies, and bring some friends for this one! How’d you like to hear how to make the world’s greatest Meatloaf?

Usually I don’t make portions this big, but I had a lot of ground beef. And a huge meatloaf is just as easy to make as a small meatloaf. So since this is one you can share, I am going to list the ingredients:

• 2lbs Ground Beef (I used 80/20 chuck this time)
• 1 bag frozen pepper & onion blend (about 12oz)
• 3-4 Strips Bacon
• 2 eggs
• ¼ cup Corn Chips
• ¼ cup Bran flakes
• ¼ cup Cheerios
• Beef broth
• Tomato Sauce
• BBQ Sauce

The best thing about meatloaf is that it is really easy to make. Just make sure the beef is nice and defrosted before you begin.

And make sure you aren’t wearing the nicest of clothes… this one will get messy!!!

First place the beef in a large enough bowl where it will be easy to knead. Add in the bag of diced peppers and onions and make sure they are in small pieces. If not, dice them to about half an inch. My local grocery stores sell these in the freezer aisle… its much easier to keep around than fresh veggies and they keep for much longer. If you can’t find this, just dice one medium onion and a bell pepper.

Before you get your hands all sticky, take the corn chips, bran flakes, and cheerios (or any other oaty cereal) and mash them up. I used a food processor which worked great. You should have about ¼ cup of each after grinding. The pieces should be nicely ground, but not quite to a powder. You’ll see where these come in later…

Pour in enough tomato sauce to cover the beef. Then, knead the mix until the sauce is mixed in well and the peppers & onions are nicely distributed. You basically have a giant meatball here!

Now, add two eggs and knead those in…

So one of the main ingredients in Meatloaf is breadcrumbs... Originally, this dish was invented as a way to stretch out a small ration of ground beef to the entire family. Unfortunately after I started preparing, I realized I didn’t have any breadcrumbs. So I looked around to see what I could add in that place. Knowing that cereals are commonly used as breading, as are breadcrumbs, the idea popped in my head. I wanted to mix the breadiness of cheerios with the stout flavor of bran flakes. Actually, I used Raisin Bran which added a sweet flavor with the added sugar and raisins.

But this wasn’t enough… I wanted something with some salt. There was a bag of tortilla chips right on my shelf. Bingo. Salty. The mix of these three was a perfect combo for my recipe. But play with the ingredients you have on your shelf… plenty of interesting combos to be found!

Add these “breadcrumbs” to the beef and knead until evenly distributed. Now, add enough barbecue sauce to cover the meat. Knead this and repeat. You should end up using at least half a bottle by the end of the recipe. This time around, I actually used a mix of two bbq sauces… one intended for pork and one for beef. See which one works best for you!

Now you are almost ready to cook. Prepare a pan large enough to contain all the beef by putting a thin layer of bbq sauce on the bottom and the sides. I personally use one of those disposeable metal baking pans for easy cleanup. Evenly distribute the meat into the pan. Then cover the surface with bacon.

Mmm bacon. The recipe gets more decadent every step! If you are a real bacon fan (and who isn’t), try covering the sides and bottom with it too!

Take some more bbq sauce and cover the top of the meatloaf with a thick coat. Then take some beef broth (A dissolved bouillon cube works fine) and pour it on top, just enough so the water level reaches the top of the loaf… you really shouldn’t need more than ¼ cup but it depends on the size and shape of the tray. This step will prevent the sides from burning and give you nice juicy end pieces!


Bake in the oven for about 45 minutes. Halfway through, carefully remove it and pour off the excess grease into the sink. Then return it, making sure no oil drips in the oven. When you are done, make sure it is cooked all the way through and brown in the middle. Allow to sit a few minutes and you’re good to go!

Excuse me if I drool a little bit...
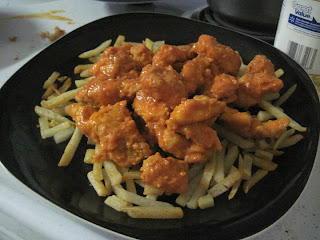
I served this with a side of Potatoes and Veggies Au Gratin. Complicated? Not at all! I cooked up a store brand Au Gratin Potato mix, and added in a can of mixed vegetables. Easy enough!

"Plated" aka "Why I need a SLR camera"

The meatloaf came out tender and decadent. Easily the best meatloaf I’ve ever had. It was a fusion of so many flavors… especially sweet and savory. Words just aren’t enough to describe how amazing it was. But to quote the great Aldo Raine, “this one may very well be my masterpiece”

I'm in the Meatloaf cooking business, and business is-a boomin!

Now I always like to give my input on what I could do better for next time. As amazing as this was, I think next time I am going to work on a way to make it less greasy. The fact that I was cooking 80/20 beef with bacon provides an oily texture which could be improved on. Next time I’m going for a leaner beef, like 93%. But I think a better suggestion would be to pop a hole or two in the bottom of the tray (why I suggest the disposable metal pan) before putting it into the oven, and placing another pan below it to catch the drippings. This should degrease the meatloaf enough without drying it out and prevent the tedium of having to drain it halfway through.

So give it a try and let me know what you think. I guarantee you’ll love this one!

And if you do, please join us on our Facebook and Twitter pages. The link to “Like” Edible Rex on Facebook is in the right column, and follow us at @EdibleRex on Twitter! Oh, and if you really like us, click on an ad or two… help keep me cooking!!!

Bon Appetit!

Wednesday, October 13, 2010

Country Fried Awesome!!!

Cube steak was on sale at Harris Teeter this week, so I decided to make a Country Fried Steak for dinner today.  Figure I’ve been living in the south for two years so it’s about time.  Been practicing my pan frying and breading skills and think I’ve gotten them down well enough.  So why not bread and fry a slab of beef.  That’s a man meal right there!

First thing you gotta do is pound out the meat.  Cube steak has already been tenderized but it’ll firm up in the package.  The thinner you can make it, the better.  Just try not to make any holes in the meat. 

I then coated the meat in a spice blend.  I used a mix of salt, pepper, chili powder, and basil - A few shakes on each side.  Then comes the breading.  I kept it simple, using flour and only flour… not even an egg, as the beef is sticky enough.  Hand coat the steak until it’s completely white.  Make sure you are thorough…  pull the beef as you do it to make sure the cracks in the meat get coated. 

Now the fun part.  Coat the bottom of a skillet with oil, put the burner up to 6, and get ready to fry when the oil starts bubbling.  Leave each piece down on each side until the breading on the top side is completely saturated in the oil… it should cook through the meat.  Then carefully flip it over and fry another few minutes. 
You may want to consider rebreading the meat a minute or two into flipping…  some may have fallen off in the oil or when you flipped it.  Breading it a second time will give it a thicker, crispier crust.

Keep an eye on the steak, possibly flipping it once or twice more for a minute each side.  Total cooking time should be between 8 and 12 minutes.  Make sure the breading is crispy and remove the steak from the pan.  You now want to let the grease drip out of the steak.  You can use the paper-towel-on-a-plate method, but I prefer letting it drip dry, like if it was in a fryer basket.  What I did was put it directly on the oven rack with a pan directly under it to catch the drips.  (Disclamer: Clean the rack after so you don’t start a fire!)

Let it dry 2-3 minutes, and you are good to go my friend…


Or are you…

I forgot the gravy!  It’s not Country Fried Steak without the special creamy gravy.

Using my keen culinary senses, I deduced what I had in my fridge that could constitute a good CFS gravy.  Something creamy, something chunky, something meaty… hmm…

The verdict:  I combined some alfredo sauce with breakfast sausage.  The sentencing:  delicious!

Put one (yes one is more than enough) breakfast sausage (the precooked type you find in the freezer section) in a bowl, cut it in half, and put it in the microwave for a minute and a half.  It should be nearly cooked and in a bit of its own grease.  Mash up the sausage into little bits… the smaller the better.  This should release some of the extra juices.  Pour enough of the alfredo sauce in the bowl to cover your steak (I used about half a cup for 2 pieces).  Mix together and microwave for another minute to minute 30.  Add a dash of pepper, mix again, and it’s ready to top off your fried steaky goodness!


Looking back, the only thing different I would do is make sure the meat was more tender.  Seriously, you want it as flat as possible… a good CF Steak can split with your fork.  Get a rolling pin if you have to!  Otherwise this was nearly perfect, an easy-to-make hearty meal.  You’ll be so protein filled that it'll pass through your genes and your kids will grow up to be NFL linemen.  Ok, maybe not, but believe me when I say this is Ultimate Man Meal!  


Happy Frying!

Monday, October 11, 2010

The Bachelor Salad

Wow, I'm shocked I got this far into the blog without telling you about the most basic of bachelor cuisine you can make:  The Bachelor Salad.  Believe it or not, I do try to eat healthy, and that includes my veggies with each meal.  And the easiest way to get these veggies quickly is in a salad.

I buy lettuce for sandwiches and stuff, but there's no way I can finish a head by myself before it goes bad.   So a salad is naturally the best way to use it up.

Problem is, when you live the bachelor life, veggies don't keep very well.  Even a minimal purchase will go bad before you have the chance to consume it all:  A good tomato won't last for more than a week - less after you cut into it.  Cucumbers wither after a few days.  And unfortunately you can't freeze most veggies that go into a salad.  You basically need to eat everything at once or you'll be wasting food.

So how does one get their daily dose of greens and not worry about things going bad?  Improvise!  Yes, use what you have around.  So I've come up with a simple recipe for things that will ordinarily be in my fridge.

I combine:
A bowlful of lettuce
A handful of pickle chips
A handful of Goldfish crackers (or crumbled tortilla chips)
Grated Parmesan cheese
And my dressing of choice du jour.

Sometimes if I have apples or raisins, i'll throw those in too.  Apples actually keep well in the fridge, so stock up!

This recipe is just an idea on how to get in a daily salad if you're not the "run to the market every day" type.  It's good because pickles and lettuce have a lot of vitamins, the cheese has protein, and the salad will take up some room that a heavy entree would otherwise consume...  gotta watch those calories! Be creative and throw in what you normally have around...  thats your bachelor salad!

And guys, consider it manly if you eat it with your meat entree  ;)

Wednesday, October 6, 2010

Cornbread Chicken

So a while ago I mentioned on Twitter that I was playing around with ideas for breading.  I've been using dry coatings, like flour and breadcrumbs, which work, but don't quite achieve the restaurant quality I've been looking for.   So I've been looking at wet batters...  and this time I used cornbread!

There were a few ideas for breaded-and-fried chicken that I had... mostly based around a stuffed chicken breast.  But this experiment was on the batter...  working on a good filling recipe!  So I decided to go with chicken fingers with dipping sauce.

Those of you in the mood to have some messy fun will love this one... Have some water nearby, your hands will get sticky and covered...

I cooked up about a pound of chicken, which was the perfect amount for a box of cornbread.  In fact, this yielded more than I expected...  2 huge portions or 3 good size portions.  Leftovers for me!  This is an easy recipe to adjust, just put in less/more flour and cornbread mix.

That's all you really need for this...  your cornbread mix will probably require milk and/or an egg so have that on hand...

To begin, you need to flatten the chicken.  In retrospect, I didn't pound it enough... the thinner pieces battered and fried much better.  If you have thick fillets, butterfly them and keep pounding.  When they're nice and flat, cut them into 1-inch wide strips.  Or any shape, really.  Some of the nugget-size end pieces fried up real good!

Now that's a Chicken Nugget!
Your hands are going to get sticky with flour, so I suggest mixing up the cornbread now.  Follow the directions on the box...  most mixes require an egg and milk.  You'll want to add in about an extra quarter-to-half cup of milk or water to thin the batter...  otherwise it gets stiff and unmanageable.  Mix in about 2 tbsp of sugar also.  Stir 'till mixed and put aside.  You'll want to prepare your frying pan too...  pour in enough oil to cover the bottom of the pan. 

Next, roll the pieces in flour.  I suggest inside a bowl or tray.  Make sure they're covered thoroughly and put them to the side.  When you are done, you're ready for the really messy part.  First, turn the heat on under the frying pan about halfway.

It's like they're going swimming...
Place the floured pieces in the bowl of cornbread mix, a few at a time.  Stir them around with a fork... but then use your hands to make sure each piece is saturated in batter.  With the fork, scoop out each piece, let it drip over the bowl, then place into the frying pan.  Repeat until the pan is full.  Now is a good time to wash your hands.

And now they're drowning...  Yum!..
Monitor the heat on the frying pan... I found 6/10 to be about the right heat.  Each side takes about 4 minutes.  You'll know its time to flip when the edges start looking crispy and brown... similar to the edge of a pancake.  The fork should work fine for flipping so long as you don't overfill the pan.

When you are done frying, fork out each piece and place on a paper towel on a plate.  Pour in some more oil between each skillet of chicken.
Some of the bigger pieces...

And there you have it!  Serve with your favorite sauce - I suggest something sweet like Honey Mustard or Barbecue or Sweet & Sour.  And choose a side dish.  You'll need some veggies to ease the guilt of this fried goodness.  I made broccoli and cheese.  Mmm, I can just taste the heart attack!

Other than using smaller pieces, there isn't much I would do differently for next time.  I still want to try a stuffed chicken recipe though... trying to decide between Spinach and Feta, Broccoli and Cheddar, or Cream Cheese and Bacon or Jalapeno.  Or any other crazy combination...  If you give me a good idea I'll give you a shoutout!

Happy eating!


*note:  tried a cold one for breakfast.  awesome!

*note2:  When cutting the chicken, make sure you trim as much fat possible.  Chunks of fat tend to mess with the texture...

Sunday, October 3, 2010

Sunday Special: Boneless Buffalo Wings

Sunday Sunday Sunday means Football Football Football, and to celebrate the weekly ritual, let us pay tribute to the greatest football food of all, the Buffalo Wing.

The signature dish of Nashville, TN is Hot Chicken:  a quarter portion of fried chicken encrusted in an excruciatingly hot dry rub.  But as tasty as this may be, you can't get anything close to the snacktacular Buffalo Wing from Upstate New York.  The signature sauce is what sets them apart.  And luckily I have the recipe.

The Original Anchor Bar Buffalo Wings


As it turned out, I didn't have any wings when I decided to make them, but definitely had chicken breast.  So why not go boneless?  Maybe not as fun as the messy wing, but easier to eat while focusing on the game.

This is what I used.  For each portion:

1/2lb Chicken Breast (One big cutlet)
Flour
* Franks Red Hot Sauce *
Butter (optional)
Cayenne or Red Pepper powder (optional)
Black Pepper (optional)

and a frying pan with oil

I highlighted Franks Red Hot for a reason...  it is critical that this is the hot sauce you use.  everything else is an imitation.  You should be able to find it in supermarkets around the country. This is the sauce used in the original Anchor Bar recipe, so consider this a non-negotiable condition.  ;)
Where it all began...


It's a simple recipe.  First you need to prepare the chicken.  If you want to make the chicken especially hot, first cover it in a layer of cayenne powder and some black pepper.  Pound it down (might wanna put it under plastic) so it is flattened and tenderized.  Then cut it into pieces...  1 inch squares should be fine.

Put a pan on the stove and add enough of your favorite cooking oil to cover the bottom, and set it to about 3/4 heat.  In a separate bowl, pour about a cup of flour for the breading.  Roll each chicken bit around until it is covered...  Don't rush this tho, make sure it gets into all the nooks and crannies of the meat.   
 
When you are done, place the pieces in the frying pan.  Every few minutes turn them until each side is browned and crispy.  Kitchen tongs work, or you can use chopsticks!  The cooking time should be around 10 minutes.

When done, place the chicken on a paper towel on a plate and let it absorb the excess oil.  Get a tupperware or similar bowl with lid and put all the chicken in there.  Then, drench the chicken with Franks.  Use your best judgement...  i'd say about half a cup will do it, but that all depends on how saucy you want them.  If you want a less spicy version, cut the hot sauce with some butter.  Put the lid on the tupperware and shake it gently.... tossing the chicken around.  When you are done, the chicken should be coated all over with hot sauce.  Remember, if it's radioactive red-orange, it's cooked right!

And there you have it!

Perfect for a Football snack or when you have friends over.  You can even try different sauce combinations...  just don't call 'em buffalo wings!

I made french fries as the side dish.  They're absorbing the hot sauce!  You can also top it off with some bleu cheese or ranch dressing.


Best in the 615...

If they aint radioactive, they aint right!


So there you have it! Give them a try and enjoy!

Saturday, October 2, 2010

Bachelor Chefing: The Orientation

Ok so before I start posting recipes and restaurant reviews, I'd like to bring up something I talked about in the first post.  That is the concept of Bachelor Chef-ing.  Bachelor Chefing isn't just a style, it's a way of life.  For those of us too busy to keep track of our kitchens, eat out often, and typically cook for one, this blog is dedicated to you. 

Typically the recipes I write are meant for one or two servings but can easily be translated into bigger portions.  Some things you just can't make for one.  Like really, what is a meatloaf for one other than a giant meatball?  A good bachelor chef knows to have lots of tupperware handy for those quick leftovers.  Gotta have something quick to eat for those times you're running between work and meeting your friends at the bar.  Don't settle for fast food!

Bachelor Chefing started for me back in college when I found myself fending for myself for the first time.  Living off campus, I had opted out of any type of meal plan and sneaking in the dining halls was risky as an every day event.  I knew how to cook a few simple things: Ramen Noodles, burgers on the Foreman grill, and Hamburger Helper....  but these were never enough for a meal for me.  Learning slowly by adding ingredients to simple out-of-the-box meals, and "reverse engineering" the ingredients  of my favorite dishes at the restaurants, I was able to put together dinners that would be familiar, cheap to make, and can be made with items most likely to be floating around the pantry.

There is a lot that goes in to bachelor chef culture.  You're expected to play with your food!  It's all about trying new things and learning how to make things more awesome.  Try out combinations of ingredients and see what works and what doesn't.  You will notice that I always have a section in my recipes for things that I would change or reconsider for the next time I cook the dish.  Feel free to adjust cooking styles to fit your tastes.  Like I don't own a deep fryer, but I'd imagine that some of the fried dishes would cook quicker and come out even tastier.

Also, I am very nonspecific on my ingredient list.  Bachelor chefing is about experimentation, so play with spices and added ingredients to your taste.  I can't tell you what you will like, or what you like a lot of, but i'll tell you the spice combinations I use.  Only major items will list quantities, like the meat used in the dish.  Everything else will be estimations, like 'one handful' or 'cover surface'.  Use your best judgment and combine that with your imagination!

The most important thing is having fun and eating great food.  Take pride in your culinary artwork; make food bigger and better and show off to friends and family!  Nothing is better than tasting your amazing work.  I find cooking itself to be a relaxing 'zen' experience, and enjoying the food is the delicious icing on the cake!

Thank you to all my readers and enjoy...  Recipes shall be posted soon!

JB